
How to Get rid of Virus Problems Using System Restore
One of the handy features of Windows XP, Vista and 7 is the System Restore utility. I’ve shared quite a bit in the past on how to remove a virus or malware by using safe mode and various other means, but one of the easiest ways which often is successful, is to use the built in System Restore tool on Windows 7 (or below).
System Restore comes built in to Windows and is switched on by default. What it does is makes a backup of your “system state” each time something changes. These changes could be Windows updates or other software you install. Take a look below to see how many “states” have been saved since I reinstalled Windows a few days ago:
To use System Restore effectively, you need to make sure you are restoring to a time period before you were infected with a virus. In some cases, a virus or malware is obvious in that you load up a web page, get an infection and your computer breaks. In these situations, click the Windows button, do a search for System Restore and restore the last backup before you were infected.
It gets more complicated if you’ve had a virus for months and only just realised as you need to dig deep in to the archives of System Restore and try find a point in time when your system was virus free. This could mean you lose some installed programs. The good news is that only the system state is restored which means all your documents, images, music etc… should be just fine.
How to Use System Restore :
This (and most other tutorials here) focus on Windows 7, but older versions are very similar in regards to system restore.
- Click Start and type in to the “search programs and files” box – System Restore. At the top of the list the System Restore program should be listed under Programs. Click on it.
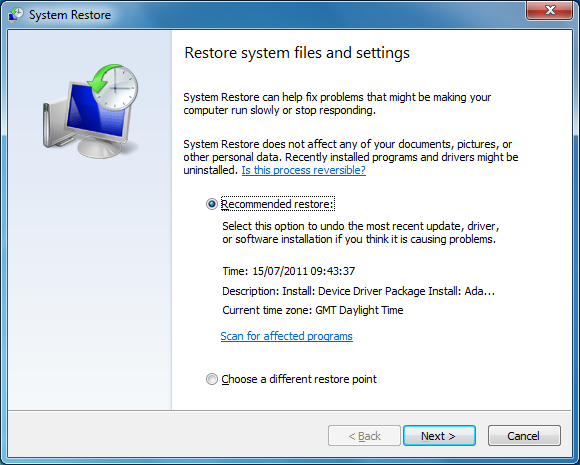
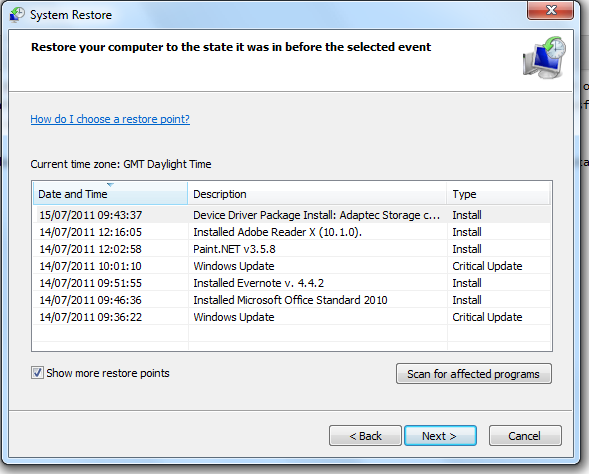
- You are presented with the screenshot above. Here you need to select the restore point you will use. If you are confident the date showing is before the time you were infected then restore that. Otherwise, select “choose a different restore point”.
- Click Next. If you selected the provided date then system restore will begin. If not, you will be presented with an option to choose from several (or more) restore points. Here you need to select one that you know for sure is before the virus hit. Select it and click next.
- Click Finish and your PC will go through the restore sequence.
- After booting, your PC will be rolled back to the restore point but at the same time, it will keep all documents/images/music etc… in place. However, you might need to reinstall some applications if you have rolled back past the installation points.
- When the restore sequence is complete we recommend updating your virus scanner/malware scanner as well as checking for Windows Updates to ensure your PC is up to date.
- Also, check to see if there are any updates to your web browser. If you’re running Internet Explorer 6 then this could be a good reason you got infected with a virus. Update to Internet Explorer 9 to be more safe while browsing online.

No comments:
Post a Comment
Thanks for the Comment.
I will get back to you soon.
Don't forget to subscribe to my blog feed by entering your email in the Subscribe box on the right sidebar.
Please Enter a Valid Email so that i can contact you.